One of the first and foremost use cases that anybody thinks of Virtual Reality aka VR is that of a Virtual Tour. With the availability of 360 camera hardware and software tools to stitch multiple photos together is has become really easy to create a single 360 image.
You would have seen or experienced something similar on Facebook for sure. Check it out here.
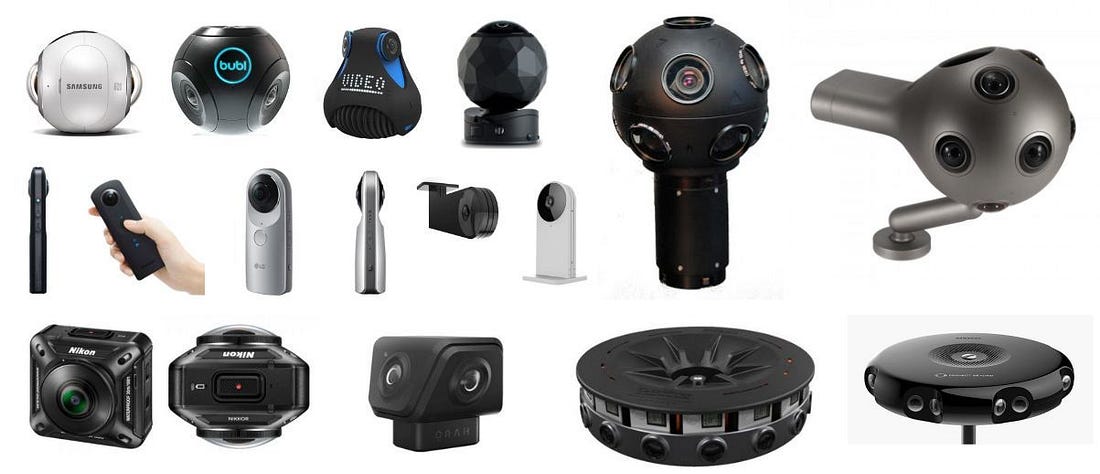
And there is a bunch of 360 camera hardware like Ricoh Theta, Samsung Gear 350, LG 360 Cam, Insta 360 Air, Giroptic IO, Virb 360, Moto 360, Panono and so on. Many more are getting added to this list and the existing ones are getting better. More on 360 cameras here.

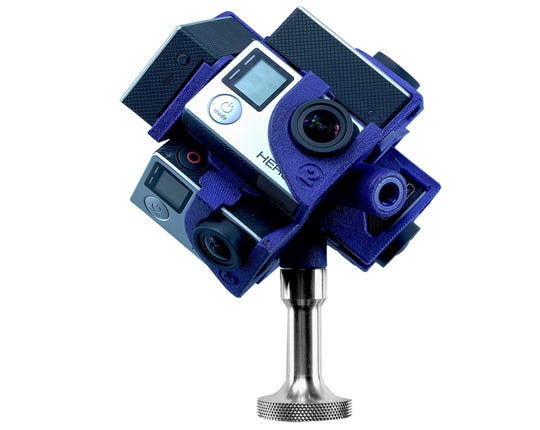
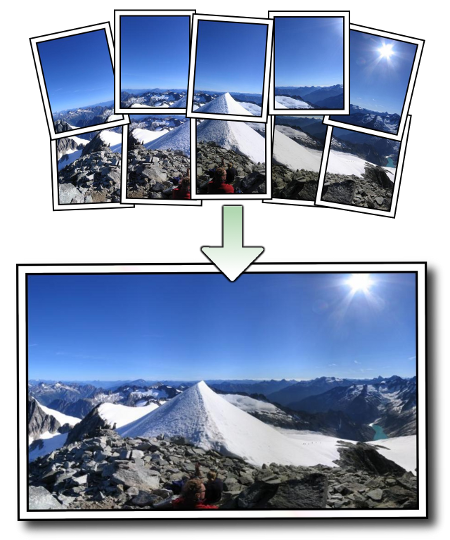
You can also use multiple action cameras like Xiaomi Mijia 4k or GoPro and put them in rigs that capture individual photos and then you get them stitched together using a 360 stitching software. See illustration below to understand what the software does.
Now that you have 360 photos with you it’s time to create your own virtual tour. Again there are many online and standalone software available that will help you create Virtual Tour in no time, developing on own has its own excitement and who know you come up with a better version!
To do so we are going to use A-frame, a web framework for building virtual reality experiences. This will be a step by step guide on how to build Virtual Reality walkthrough experience using 360 photos and Aframe. However, I won’t tell more about Aframe other than what’s required for the task at hand. You can learn more about Aframe at Aframe-School.
And we are going to build the experience on glitch.com.
1. Open base framework
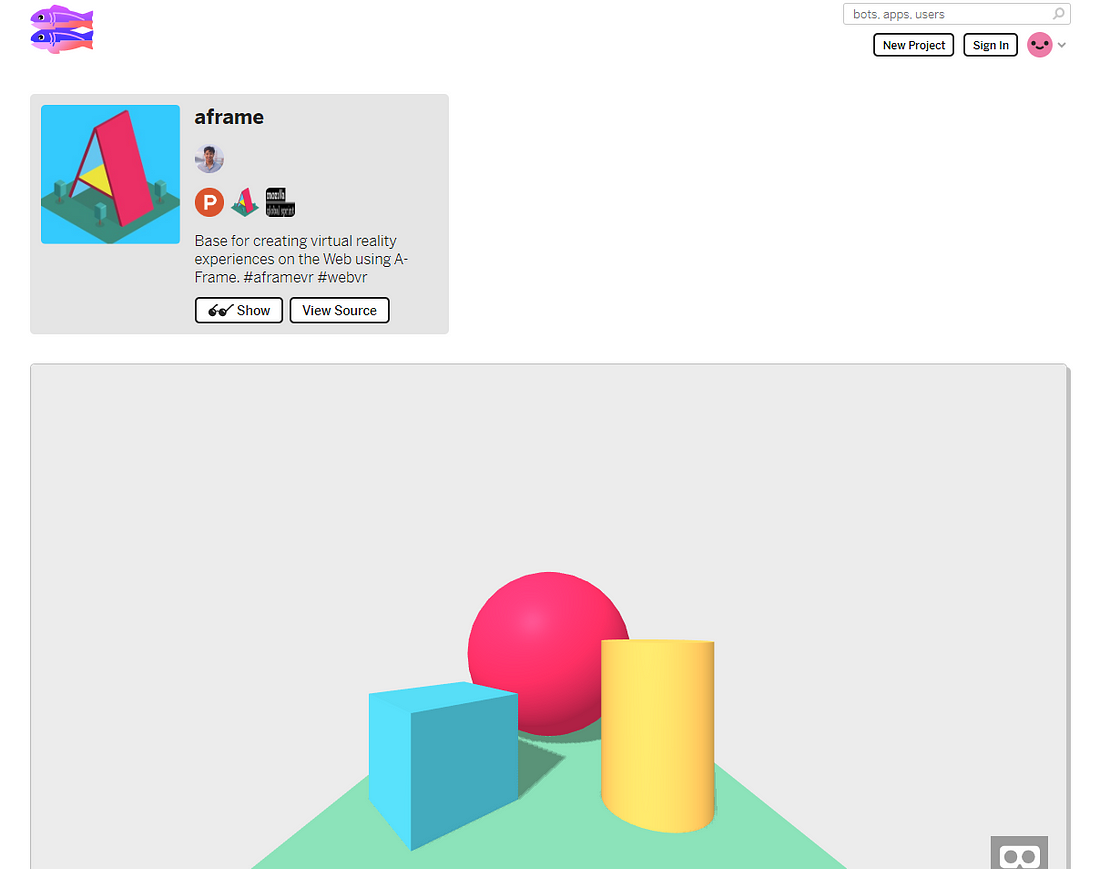
Go to glitch.com/~aframe. You should get a view as below
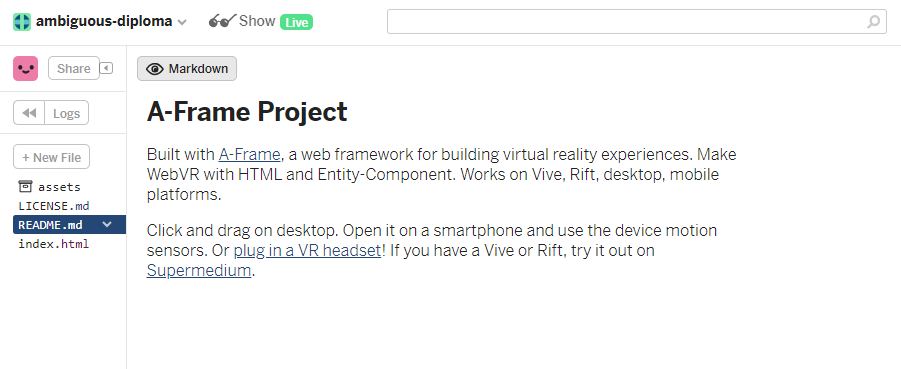
Scroll down a bit and you’ll see “Remix your own” button at bottom right of the screen, shown as below

Click on Remix your own button to open the online code editor of glitch with Aframe basic code in it.
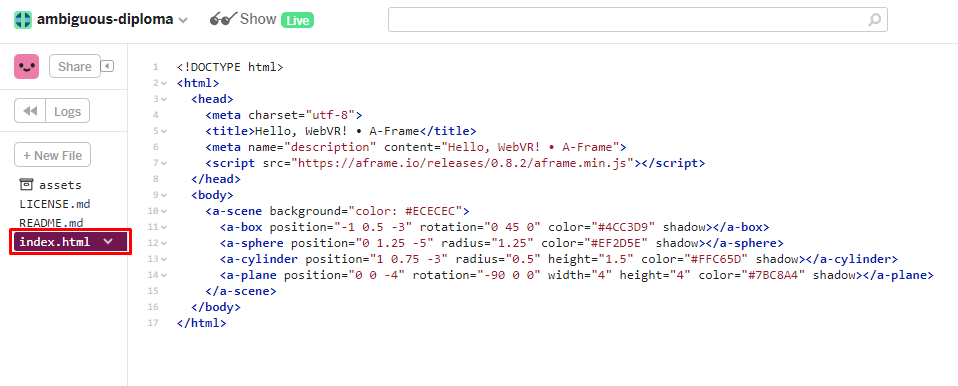
Click on index.html as shown below to open the html file in which all the sauce is.
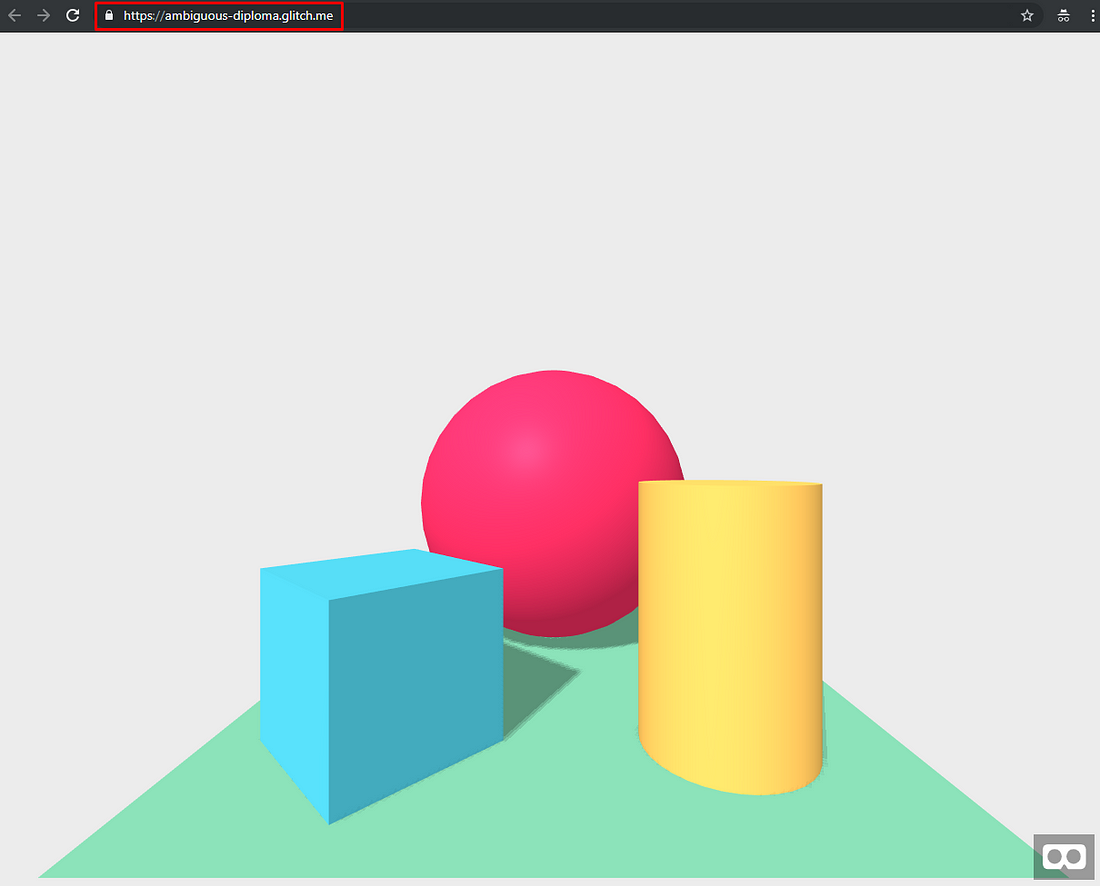
Aframe is a javascript framework hence you add the entire script base in your code using script tag and linking it to the online URL where the script is hosted. If you click on “Show live” button on the top panel you should get a view like below. Notice the URL in address bar of the browser. If you open the same URL in your mobile browser you should get the same view.
In case things don’t look proper in your mobile browser and the view is shaky or jittery you’ll need to install Google VR services and enable webvr mode in the browser.
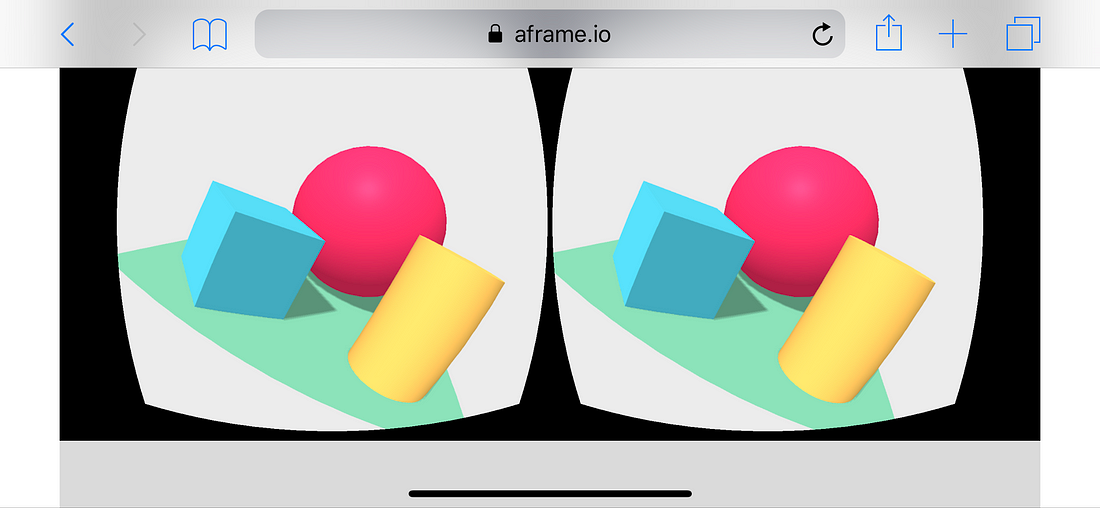
You can enter VR mode by tapping on the Cardboard icon on bottom right of the screen. The output should look as below. You can exit this view by hitting back button (Android) or tapping a close icon on the top left of the screen (iOS).
If the view is jittery or shaky on your phone, try changing the aframe version to 0.7.0 as shown below
<script src="https://aframe.io/releases/0.7.0/aframe.min.js"></script>
You place all the code for aframe for rendering a webVR scene within <a-scene> tags as below. Same can be seen in the default code base open in index.html file.
<a-scene></a-scene>
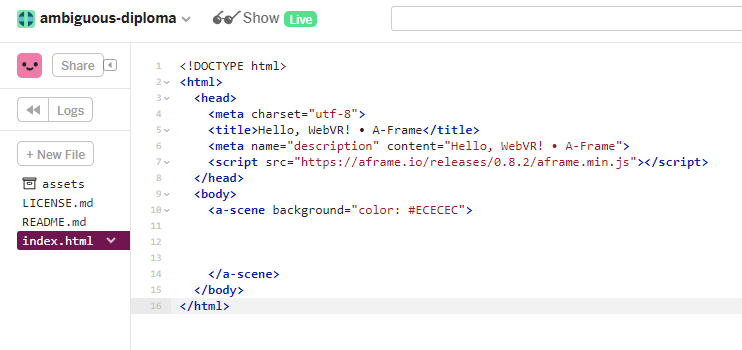
Remove unnecessary code and the state of your file should be as below
2. Add Skybox
<a-scene>
<a-sky id="skybox" src=""> </a-sky>
</a-scene>
Add skybox to your VR scene by adding a-sky tag. Do not forget to give it some unique id. We will be using this id for changing the skybox image. If you check the VR scene (by clicking on Show Live or refresh in a browser) you won’t see anything since the source of the sky is blank. By the way, in glitch, there is a live preview feature which means that as soon as you change the code the changes will be seen right away. This is applicable in laptop browser only. For mobile, you’ll still need to refresh.
“A skybox is a panoramic texture drawn behind all objects in the scene to represent the sky or any other vista at a great distance. The objects in skybox do not change position irrespective of player movement, since it’s considered to be at infinity”
3. Add 360 images
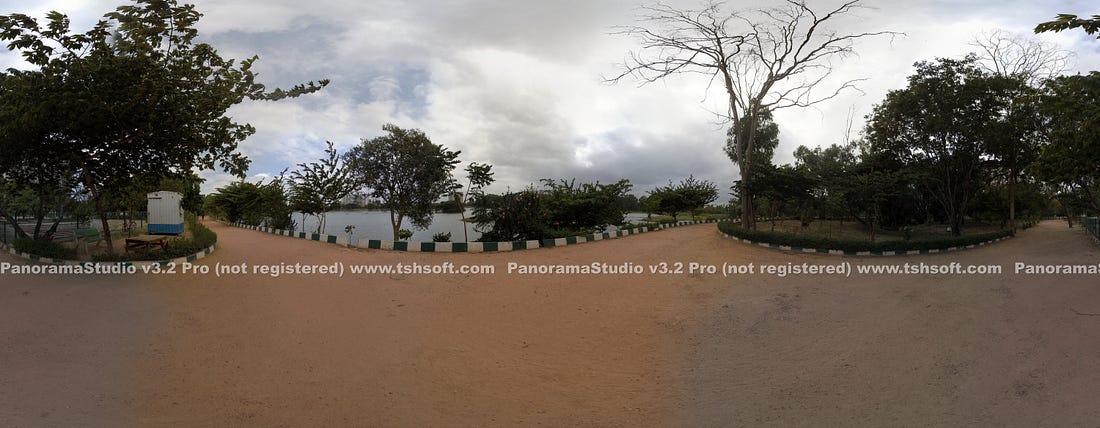
Next step is to add the images so that we can load them whenever we select to move to different points in our Virtual environment. Remember these images need to be equirectangular 360 images. See the image below for reference. In the earlier section, I have given a list of hardware and software to capture, process and create these images. If you have Ricoh Theta S, you can get the image directly in equirectangular format.
I used GoPro for taking individual photos and then stitch them together using a free version of PanoramaStudio Pro to get an equirectangular image. To add images click on the assets link on the left side of glitch editor
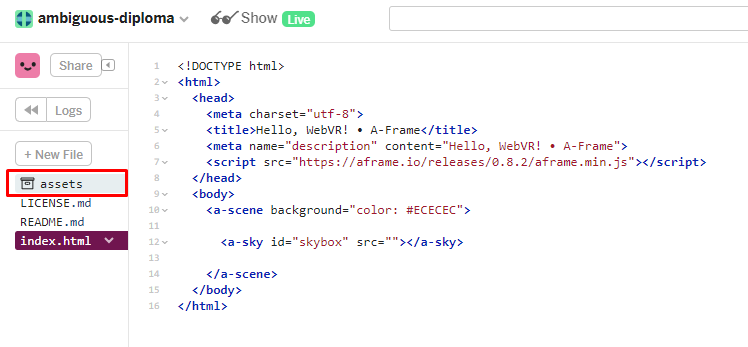
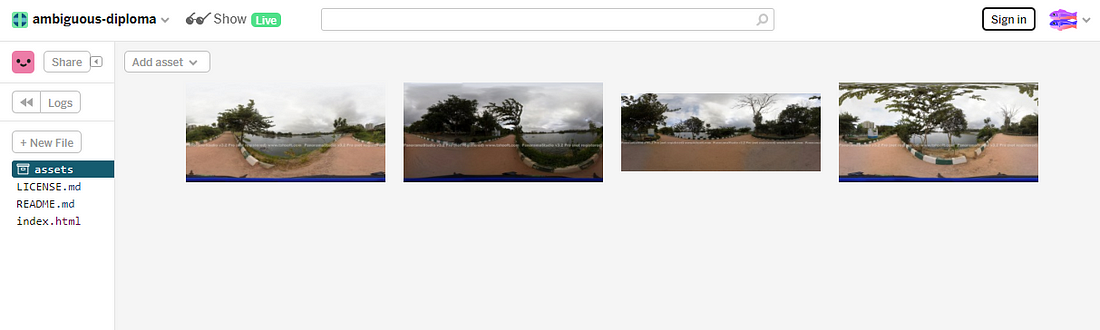
You can drag and drop all of your equirectangular images in this section. Once uploaded your assets section should look somewhat as below
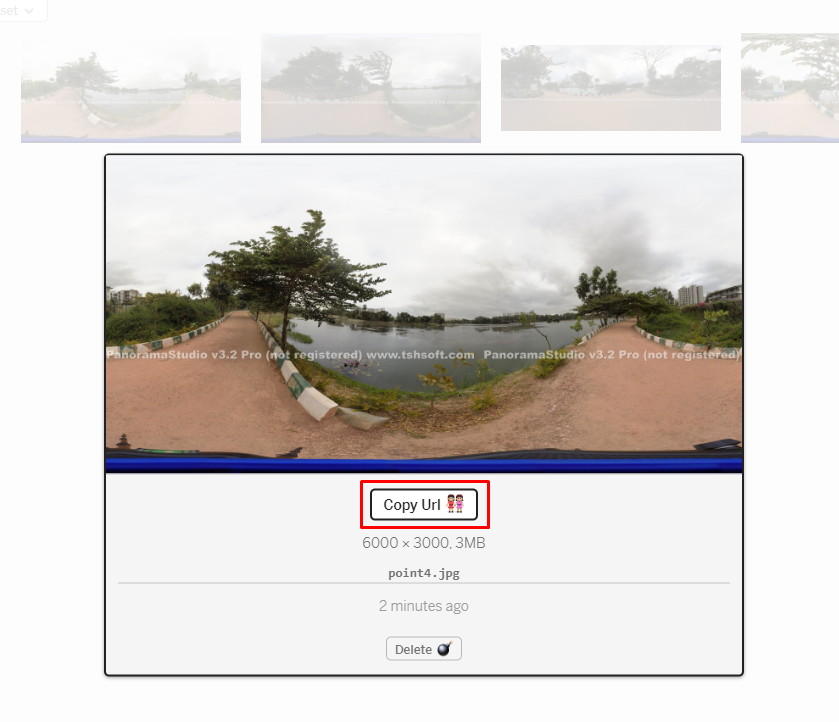
Now you need a reference to access these images in aframe. Unlike normal hosting, assets are saved on the cloud in glitch. Hence each image will have a different url. Click on each image and then copy url.
Remember to add an image for the hotspot icon. I have used as shown below. All the assets are anyways present in the glitch code link shared at the end of the article.

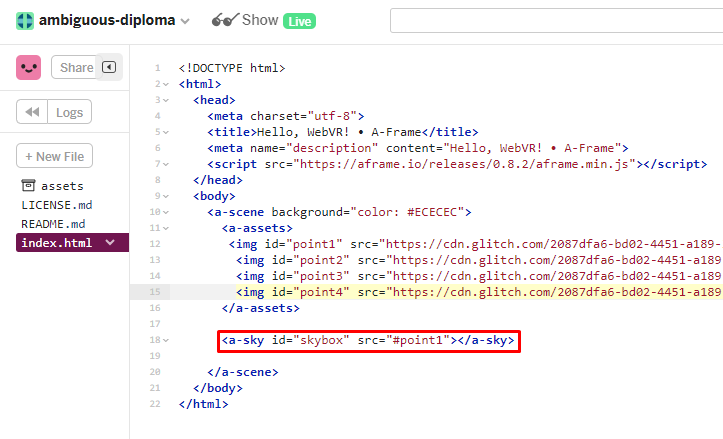
Once you have copied the URL of all images, get back to index.html section and we’ll now load the images in aframe.

Aframe has an asset management feature, wherein all the assets — images, sound, 3d model etc. are preloaded before the scene is rendered. This makes it possible to render the scene in one. We won’t discuss the downside of it here. As you can see in the image above img are added within a-assets tag. Now copy your 360 image URLs to individual img tags and remember to give a unique id to each img tag.
Next, we need to set our landing space to one of the 360 images. So for that specify the id of the first image in src of a-sky tag as below. Notice “#” before the id. Many times people forget this and then cry that things are not working.
Now if you check the live preview you should be able to see the 360 image. It will be more fun to see this in mobile and that too in VR mode.
4. Creating Hotspot component
Now that we have all the images for all the points in our VR walkthrough loaded in asset manager we need some way to tell the system to load them whenever we look at that. We’ll talk about interaction in the next section. But to reveal the mystery we are going to have a gaze interaction, wherein we’ll focus on the hotspot icon for say 2 seconds and then the system will load 360 image attached to that hotspot.
“Let me give a little background to a component in Aframe. Aframe is built on an Entity Component System framework. Whatever you see (for ease I have said something that’s visible, but the entity can be invisible items too) in the scene is an entity. You attach behavioral properties to the entity using Component.”
So without going in deep of explaining the code for hotspot component, you can copy the below code directly in your editor.
<script src="https://unpkg.com/aframe-look-at-component@0.5.1/dist/aframe-look-at-component.min.js"></script> <script> AFRAME.registerComponent('hotspots',{ init:function(){ this.el.addEventListener('reloadspots',function(evt){ //get the entire current spot group and scale it to 0 var currspotgroup=document.getElementById(evt.detail.currspots); currspotgroup.setAttribute("scale","0 0 0"); //get the entire new spot group and scale it to 1 var newspotgroup=document.getElementById(evt.detail.newspots); newspotgroup.setAttribute("scale","1 1 1"); }); } }); AFRAME.registerComponent('spot',{ schema:{ linkto:{type:"string",default:""}, spotgroup:{type:"string",default:""} }, init:function(){ //add image source of hotspot icon this.el.setAttribute("src","#hotspot"); //make the icon look at the camera all the time this.el.setAttribute("look-at","#cam"); var data=this.data; this.el.addEventListener('click',function(){ //set the skybox source to the new image as per the spot var sky=document.getElementById("skybox"); sky.setAttribute("src",data.linkto); var spotcomp=document.getElementById("spots"); var currspots=this.parentElement.getAttribute("id"); //create event for spots component to change the spots data spotcomp.emit('reloadspots',{newspots:data.spotgroup,currspots:currspots}); }); } }); </script>
Well, that’s too much of code and you won’t understand a bit of it if you are a total new to Aframe. To make things simpler just add it as shown below. Just see the 2 arrows to understand where the code it to be added. This code is generic and will work with any number of 360 images and hotspots 🙂
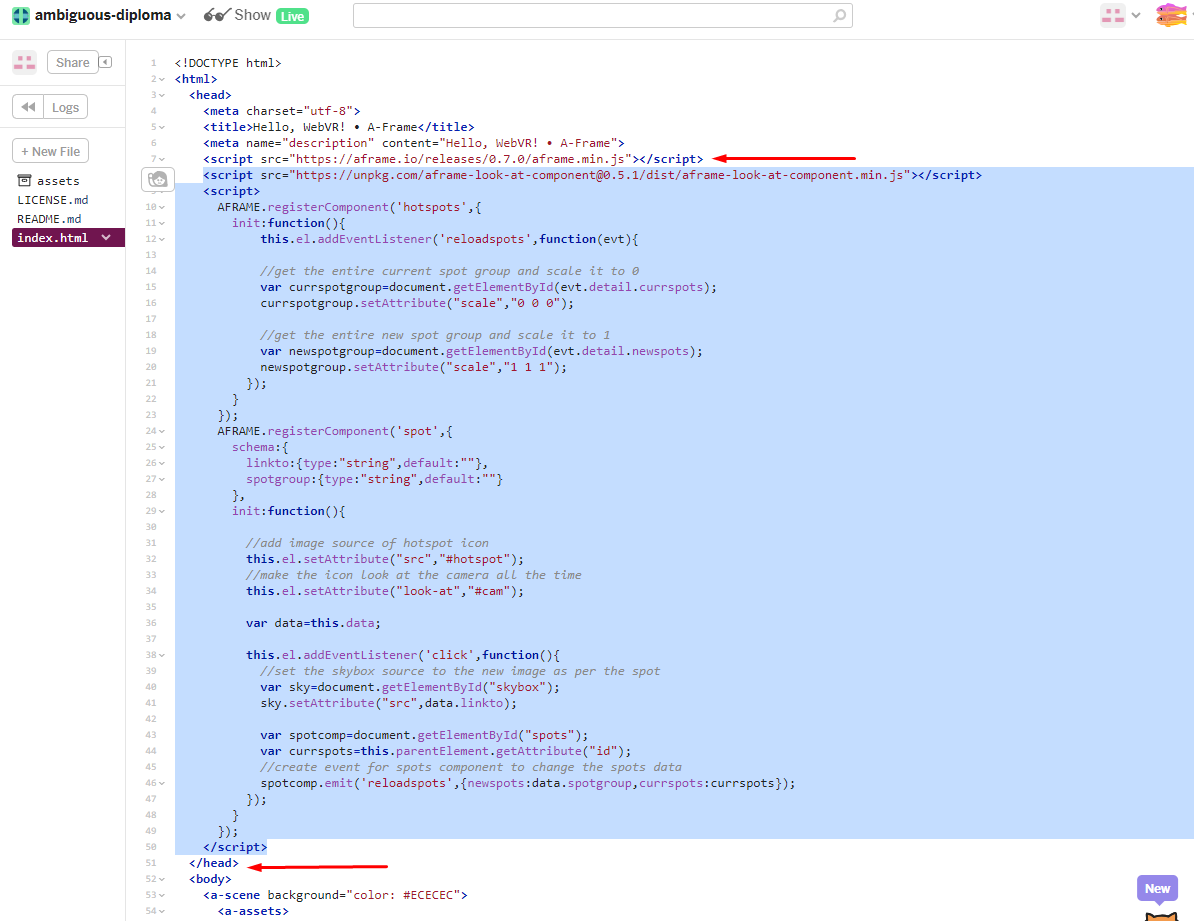
Notice that the first line of code copied is a link to the script for look-at component. This component is used to make our hotspot icons always look at the camera. Understand that we are in 3d space and the hotspot icons being plane need to be oriented towards camera else they look skewed. look-at component makes it easier for auto orientation of these icons.
6. Add camera and cursor
Add the following code just before end tag of a-scene.
<a-entity id="cam" camera position="0 1.6 0" look-controls> <a-entity cursor="fuse:true;fuseTimeout:2000" geometry="primitive:ring;radiusInner:0.01;radiusOuter:0.02" position="0 0 -1.8" material="shader:flat;color:#ff0000" animation__mouseenter="property:scale;to:3 3 3;startEvents:mouseenter;endEvents:mouseleave;dir:reverse;dur:2000;loop:1"> </a-entity></a-entity>
It adds a camera entity and places it at user eye height and enables controls to look around using mouse and camera gyroscope.
It also adds a cursor entity and enables gaze-based interaction with hotspots. Notice fuseTimeout:2000. It specifies how long should the system wait before emitting click event on the entity on which gaze is focussed. See the image below for reference.
We are having a scale down animation feedback in our code to show the fuse timer. For this, we use an animation component. Following script code to be added for enabling the animation component. For reference, I have shown the script tags of aframe and look-at component.
<script src="https://aframe.io/releases/0.7.0/aframe.min.js"></script>
<!--animation component script--><script src="https://unpkg.com/aframe-animation-component@^4.1.2/dist/aframe-animation-component.min.js"></script>
<script src="https://unpkg.com/aframe-look-at-component@0.5.1/dist/aframe-look-at-component.min.js"></script>
7. Add the real data — 360 images
Copy the below code to add image set to the scene.
<a-entity id="spots" hotspots> <a-entity id="group-point1"> <a-image spot="linkto:#point2;spotgroup:group-point2" position="-4 0 10"></a-image> </a-entity> <a-entity id="group-point2" scale="0 0 0"> <a-image spot="linkto:#point1;spotgroup:group-point1" position="10 0 -8"></a-image> <a-image spot="linkto:#point3;spotgroup:group-point3" position="0 0 10"></a-image> </a-entity> <a-entity id="group-point3" scale="0 0 0"> <a-image spot="linkto:#point2;spotgroup:group-point2" position="10 0 3"></a-image> <a-image spot="linkto:#point4;spotgroup:group-point4" position="-10 0 -3"></a-image> </a-entity> <a-entity id="group-point4" scale="0 0 0"> <a-image spot="linkto:#point3;spotgroup:group-point3" position="0 0 -10"></a-image> </a-entity></a-entity>
The code has a group called hotspots and in it, there are subgroups of spots to be shown in each virtual spot. Say you are at a particular point in space, let’s call it point-1. From this point, you can go to 3 other points. So you’ll have 3 spots, gazing at which will change our skybox source to the respective image of that point.
The structure is as below
hotspots--group----spot
And it can be as below in generic case
hotspots--group 1----spot 1----spot 2----spot 3--group 2----spot 1----spot 2--group 3----spot 1
If you have 5 360 images shot from 5 different points, then you’ll have 5 groups and each group will have as many numbers of spots as the number of places you can go to.
And now the tricky part. Assigning position to each spot. Here I have done it manually. You will have to do a good number of trial and error to position the spot to the location so that it matches with the place you are going to land in.
The entire code and output can be found at below link.WebVR — Aframe — VRWalkthrough
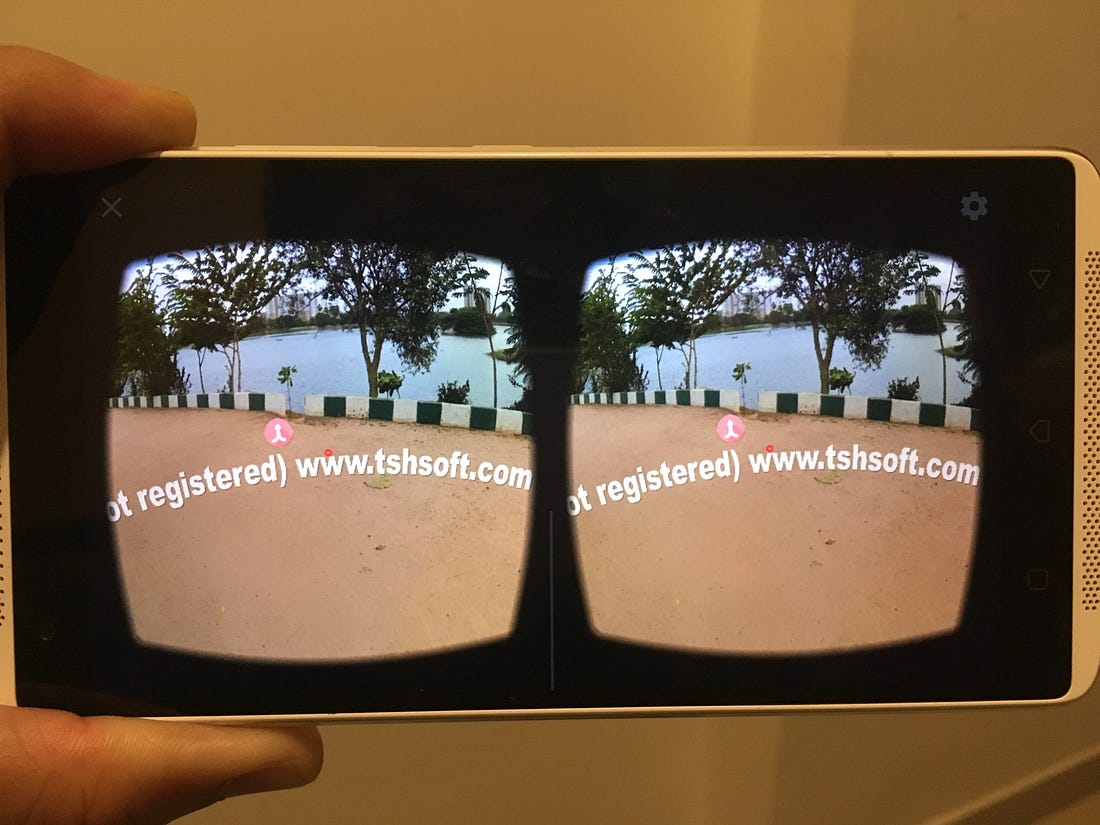
Below is the output on the mobile phone.
Happy coding!
Thanks for reading. Keep following Designerrs Lab for more insightful articles related to User Experience Design. To learn UI/UX Design for Virtual Reality using Oculus, Get mentorship from industry experts from Samsung, Microsoft, Cisco, IDF and start your career as a VR UX Designer, check out this course offered by Designerrs Lab on “Designing for Virtual Reality”.
How to create Virtual Tour using A-Frame was originally published in DSchool on Medium, where people are continuing the conversation by highlighting and responding to this story.